Circle Skirt
Want a skirt that hangs in big billowy drapes instead of straight down? Then let's make a circle skirt. Some lesser circle skirt patterns are less circular and come in two pieces or some such like that, but you and I are going to make the real deal.
You'll need:
 Cloth -- You need something that drapes easily
and isn't too stiff. I will find you if you use quilting cotton.
Cloth -- You need something that drapes easily
and isn't too stiff. I will find you if you use quilting cotton.
Sewing supplies -- Thread, needle, scissors, machine
if you want it.
Two of the cheapest rulers you can find
Something to mark with -- A piece of chalk, a fabric
marker, whatever makes you happy.
Tape
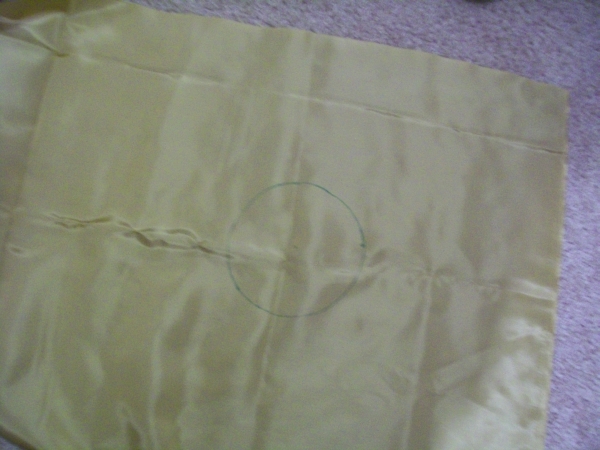
Now, in order to make a circle skirt, we're going to need to make a circle. Specifically, we need to cut two concentric circles. The big circle is your skirt (no duh), and the smaller circle would be where ... well, where the doll goes.
"BUT BEAN," you are currently screeching at the top of your lungs as you maniacally grab your hair, "I DON'T KNOW HOW BIG TO MAKE THE CIRCLES!"
Chillax. This project requires some easy math to do. Quit freaking out! If you were awake at some point during middle school algebra, you'll be okay. I'll even be really nice and let you use a calculator. Please don't flip and start hitting the back button, I promise that we'll get through it okay.
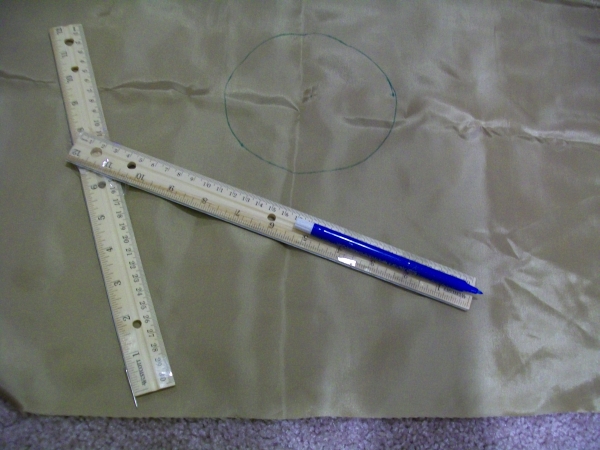
To continue, we need a draw a huge circle, and for that we need a huge compass. The best way to get one is to time travel to the 1990s and break into an elementary school, because back then every teacher had huge compasses that they used on chalk boards. But, let's pretend you don't have a time machine. What would McGuyver do?
Something akin to this.

What up, home made compass! On one of those rulers, I have a regular pin taped to the end. On the other, a fabric marker! I've got the ends taped together, and I have the distance between the marker and the pin set to the radius of the inner circle (which you should know if you DID YOUR MATH!)
Take your marker and mark a center point on the cloth. Make sure you're giving yourself enough room to cut the outer circle.
Stab the pin into the center point and, using the marker, draw out the inner circle.
Now, set your compass again (you're going to have to tear off the tape and re-tape it) so that the distance between the pin and the tip of the marker equals the length of the outer radius. I had to jimmy mine like this, your results may vary.
Jab that pin in the center point and draw the outer circle. Remember, you're using the SAME CENTER POINT!
Draw that outer circle like you mean it.

Now, you'll need to cut the center of the circle out. Also, you need to slit your circle so that we can add velcro later so that your doll can get in and out of the skirt. Cut along a radius straight into the skirt, then cut the inner circle out. You should wind up with a giant tire.
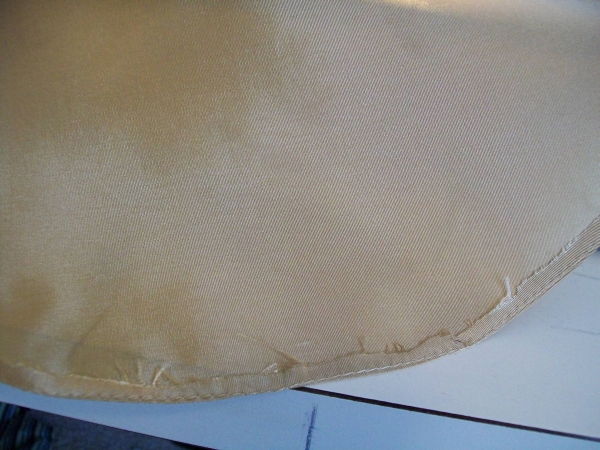
Und now we narrow hem. Here is the definition of a narrow hem: narrow hems, or circular hems, are stupidly hard, they suck, and I hate them. That's the technical definition, you can find it in a dictionary. Seriously, all the math you did to get to this point was easier. But, narrow hems are the only way to hem a curved surface (unless you were going to line this whole skirt, but come on, you really weren't!) So, we have to learn how to do them.
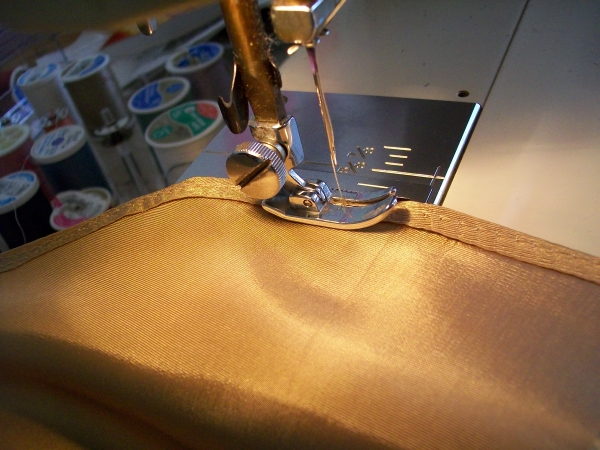
I looked all over the eWebs for a narrow hem tutorial I liked and couldn't find one, so I guess I have to make my own. On the outer edge of the circle, stitch a straight seam about 1/4 inch from the edge. Now, using that stitch as a guide, press the edge of the skirt inward. You'll have to use plenty of water. Stitch it down.
Trim the cloth as close to the edge of the seam as you can manage. Press it in again and stitch it down.
Now you've got a hemmed up skirt! You can shove it in a waistband if you want, or sew it to the bottom of a bodice for a full dress. Whatever makes you happy. Don't forget to add velcro!