Crinkle skirt
The crinkle skirt, honestly, is pretty easy, and if you have cloth scraps laying around, you can use them up this way, too. This is a very basic sewing project. Here's what you'll need:
 Scraps of cloth -- I would say a minimum of three
to look right. Feel free to use more. (You can try it with less, just know
that your skirt won't be quite as wild.) Cotton is the best material to use,
because for this project, you need something that can soak up water and can
wrinkle. Lucky you, it's also cheap.
Scraps of cloth -- I would say a minimum of three
to look right. Feel free to use more. (You can try it with less, just know
that your skirt won't be quite as wild.) Cotton is the best material to use,
because for this project, you need something that can soak up water and can
wrinkle. Lucky you, it's also cheap.
Sewing supplies -- Whatever you need to sew. Needle,
thread, scissors ... I use a machine because it's easier and faster. Plus,
I promise your project will come out neater on a machine. In this
example, I used a machine that could do decorative stitches. You'll see why.
You don't need to do decorative stitches, though; a straight stitch will
work for the whole project.
Elastic -- For the skirt.
An iron, a pressing cloth and a squirt bottle --
To press seams with. If you're a kid, make sure you get an adult to help
you.
A sink, plus any sort of fasteners -- I had the
best luck with clothespins, after some experimentation, but hair bands will
work too. You can honestly probably get a wide variety of things to work
if you want to play with it.
To start, take your doll.
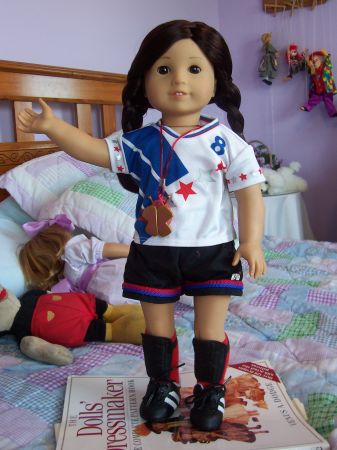
Drop her shorts. Don't worry, dolls actually love running about in their underwear. (Speaking of which, if your doll wears underwear, don't take it off for this next part.)
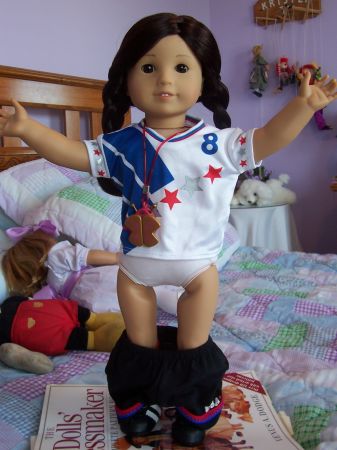
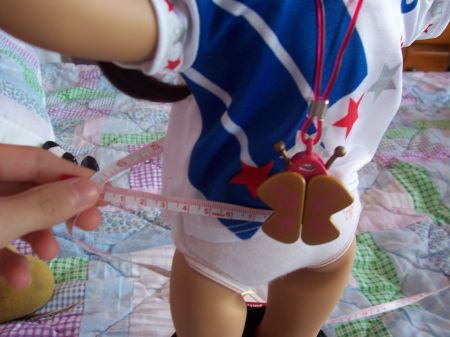
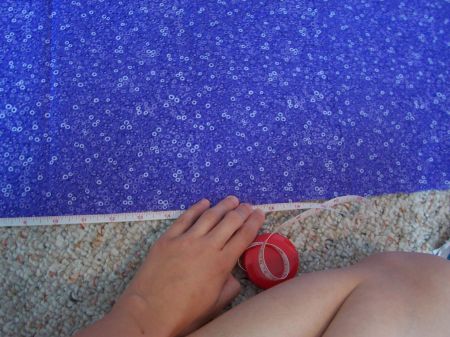
Measure around your doll's waist where the waistband of the skirt will hit -- typically, where the waistband of her underwear hits. If your doll doesn't wear underwear, it should be somewhere below the tag. I haven't really met two dolls yet that had the exact same waist line measurements -- I have four dolls in this house, all with different waist lines. Typically, Mattel dolls run close to eleven inches and Pleasant Company dolls run nearly twelve.
Decide how long you want your skirt, then measure from the doll's waist line to where you want the hem to hit.
There is math involved in this next part. How many different pieces of cloth do you have? Decide which you want to be at the top of the skirt, which you want in the middle, and which you want at the bottom. To figure out how long of a piece you need, divide the length of the skirt up by the number of cloth pieces you have. (If you want to be complex, you can now start adding and subtracting length from each piece to make the stripes different lengths. You don't need to do this step unless you really want to.)
These next few steps will give you your length measurements.
To your top piece, add at least a half inch, since you'll be putting in an elastic casing.
To your middle pieces, add at least a quarter inch for a seam.
To your bottom piece, add at least a half inch for a pressed seam.
IF YOU THINK YOU NEED TO ADD MORE CLOTH, ADD MORE CLOTH. Get that tattooed somewhere on your body, it's probably the most important rule of sewing. If you hem big or you're a clumsy presser or you just want to burn up cloth or anything, please go ahead and add more cloth. You can always go back and make the skirt shorter if you need to, but you can't really make it longer.
To determine how wide to make your strips, take your doll's waist measurement and add anywhere from half to two-thirds your doll's waist measurement. (Depends on how floofy you want the skirt to be. More cloth will make it fuller.) This gives you your width measurement. (For those of us not wanting to fool with fractions, this is going to come out to be somewhere in the neighborhood of 16 to 20 inches. I did 18, for reference.)
Now, you should be able to determine the length and width of your rectangles (the ones we're about to cut) that way. Make sense? Each rectangle will be whatever length you came up with by whatever width you came up with. How long it should be by how wide your doll is. An MSPaint diagram for those of us still struggling:
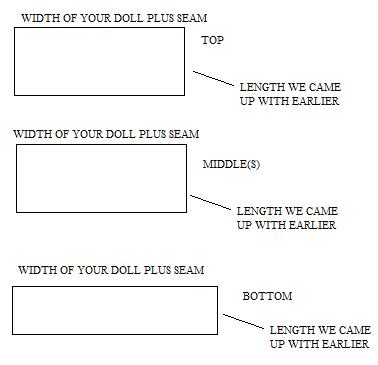
I have no idea if that helps or not. Also, those rectangles are absolutely not to scale.
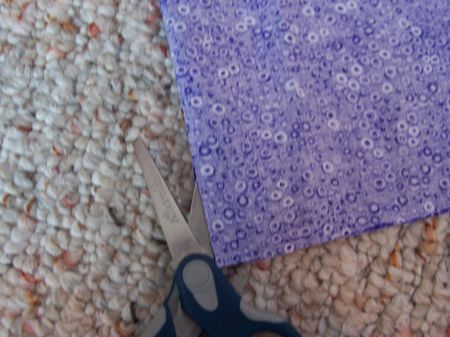
Okay, so get out your three pieces of cloth so we can cut rectangles. Let me show you how to cut more or less even rectangles:
Measure your length.
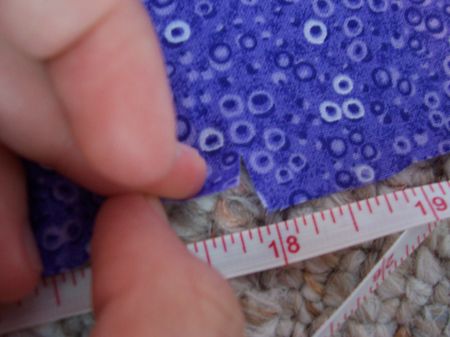
Make a teeny cut where you want it.
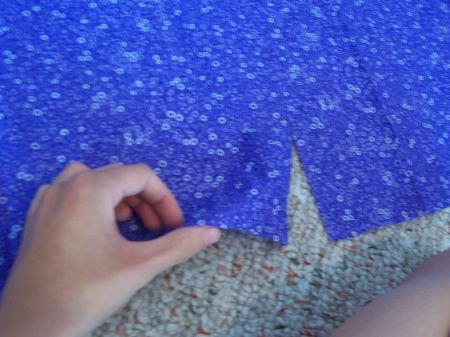
Fold very evenly along your cut (make sure the bottom two edges of the cloth line up), then measure your length.
Make a teeny cut to mark your length.
Pull your scissors tight along the crease, and cut along the fold.
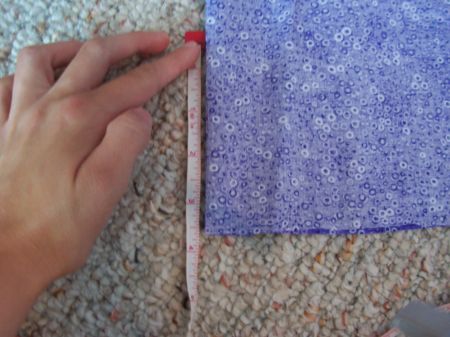
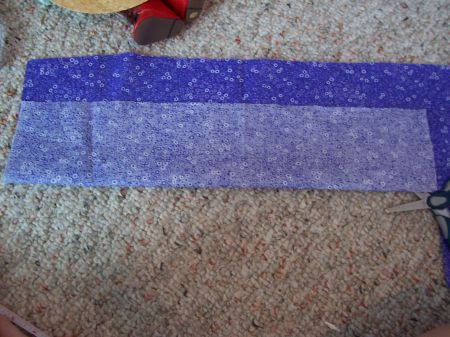
Thusfar, you should have this.
Now fold the cloth like I've got above -- up, so that the two edges on the side still meet up. Stick your scissors in the fold and cut just like we did a second ago.
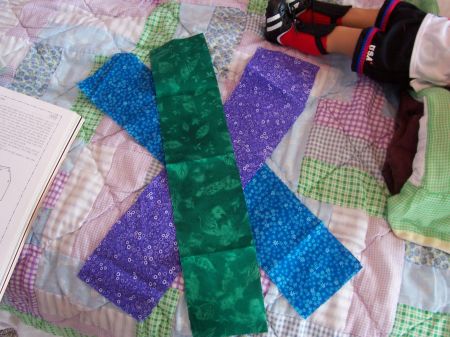
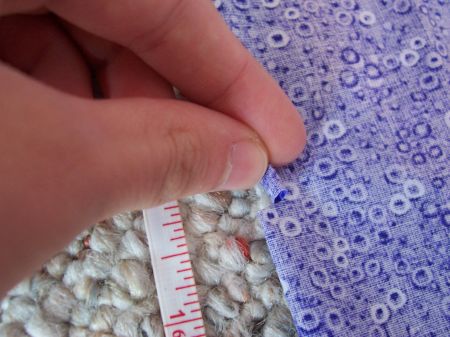
Keep on trucking until you have all your pieces.
Now we're going to press all the seams before we sew them -- this will make them neater when we actually take them to the sewing machine, but more importantly, it's going to make sewing everything down worlds easier.
Pressing seams is different than pressing your clothes. When you press a seam, you're trying to teach the cloth to way in a new way -- typically a new way that it doesn't want to lay. Go figure. I'd turn your iron on the hottest setting that your cloth can stand. If you're using cotton like you should be, that should be as hot as possible.
Now, the natural thing to try to do is to hold the seam down with your fingers while you press. However, my iron is a real jerk and burns my fingers with steam when I try to do this. However! There's a way around this with science!
Wet things stick together. Don't believe me? Step into the shower and look at your hair. So, our trick here is to wet the cloth first, stick it together the way we want, then lay the pressing cloth over it and iron it very well.
For your top piece, fold the top edge down once, press, then fold it down a second time and press. This will make your elastic casing, so make sure you give your elastic enough room to travel through the tunnel you've just made.
For your middle pieces, fold the top edge down once and press. Don't worry about the bottom edge for now.
For your bottom pieces, fold the bottom edge up, press, then fold the bottom edge up again and press. This is your hem. Make it small, but still give yourself room to sew. Fold the top edge down and press.
Good, all pressed? Now we can finally sew!
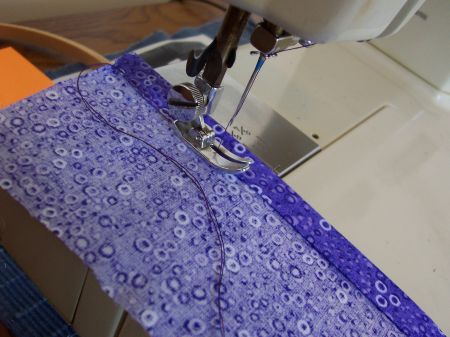
On your top piece, stitch the elastic casing down first. Sew on the wrong side of the cloth. Sew as close to your pressed edge as you can, but still make sure you're catching everything with your stitches. It will look like this going through the machine:
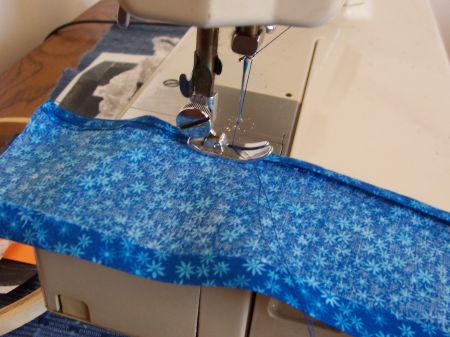
On your bottom piece, stitch down the hem, much in the same way. A photo for reference:
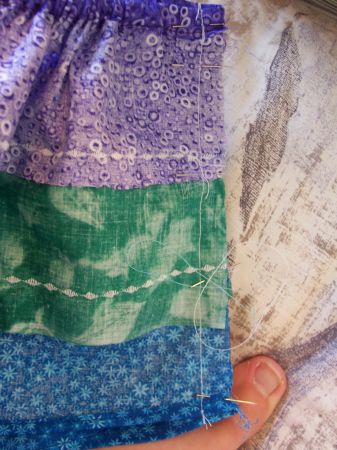
Now that everything's hemmed down, we can start attaching the pieces together. Remember the top edge of the middle piece we pressed down? Pin that edge on top of the unpressed edge of the top piece.
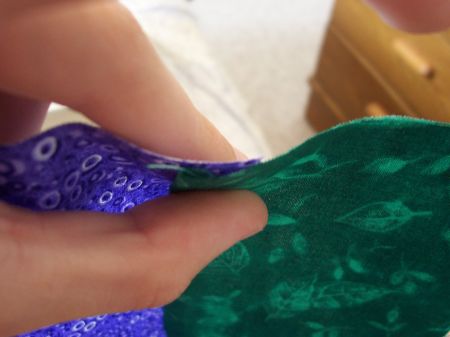
Here's how I pinned it.

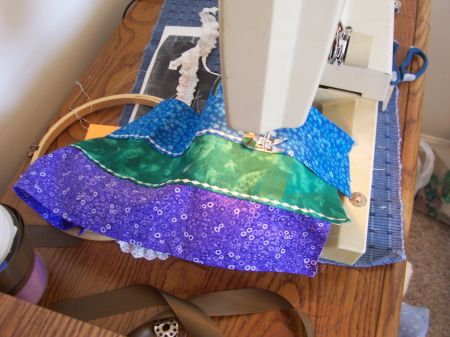
Sew that sucker on. You'll notice I'm using contrasting thread and a fancy stitch. I'm just showing off. If you know how to do this, great. If your machine can't do this or you don't know how to get it to do this, don't sweat it, as a straight stitch will work fine.
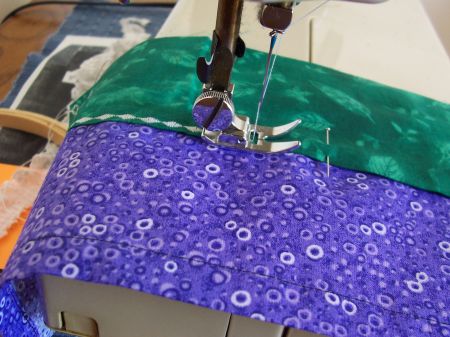
(Some of you are wondering right now why we didn't sew this down right sides together. Honestly, this is just a special effect. You can certainly do it right sides together, but it won't come out like ... I'll show you at the end.)
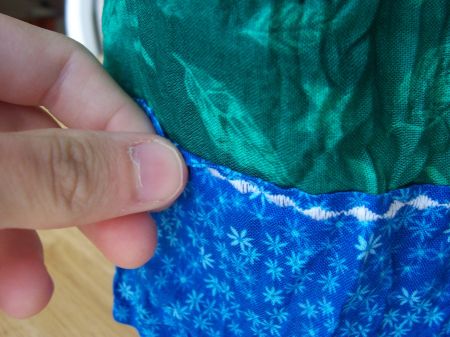
Check your seam to make sure that you caught both cloths all the way through.
Now do the other pieces in the same way, pinning the new piece to the top and sewing, until you get to the bottom. Make sure you're always sewing a pressed edge on top of a raw one!
Now that that's done, let's add the elastic. Measure a piece of elastic about a quarter inch shorter than your doll's waist.
Look closely at my set up here, because this will save you some heart ache:
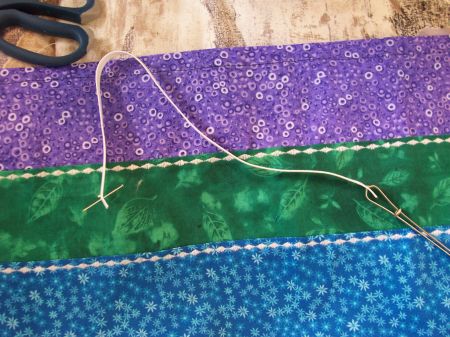
On one end, I have a bodkin, a special tool you snap on the end of elastic to pull it through casings, just like we're about to do. If you don't have a bodkin, don't sweat, just use a safety pin. On the other end, I've stuck a straight pin halfway through. That way, when I start pulling the elastic through, the safety pin will anchor the end. (You need to have both ends sticking out of your casing by the time you're done with this. If one end slips, you must dig the elastic out and start over. Otherwise, the waist band won't stretch.)
Pull the elastic through by the bodkin, or safety pin, whatever you used.
Pin both ends to the ends of the elastic casing. Like I said, don't let either end slip!
Now, pin one edge of the skirt to the other, doing your best to match up the hems. You should wind up with this:
If everything came out okay, and the elastic survives a good stretching or two, turn it inside out and put it on your doll.
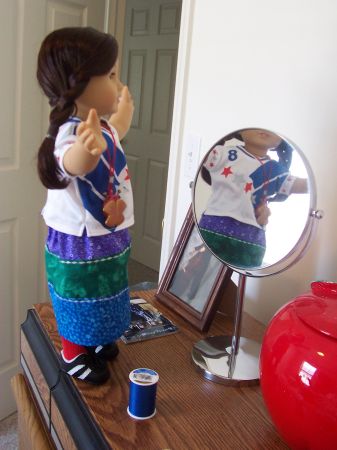
Jess likes it okay, but ... hrm. It seems kind of square, she says. She's right. It is a crinkle skirt after all.
This is the most fun part of the project.
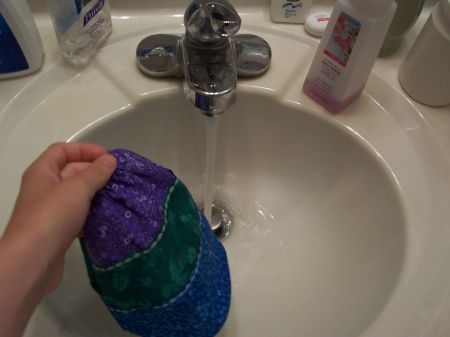
Douse the skirt. Soak it. Completely.
Twist it tight, and secure it any way you can. I initially tried rubber bands, but I didn't think it crinkled enough. Eventually I tied it up and secured it with clothes pins, which I felt got better results. Anyway, let it dry somewhere. Since it was summer, I put the skirt on the dashboard of my car, where it gets about 134920970345 degrees kelvin. The skirt was dry in a couple of hours.
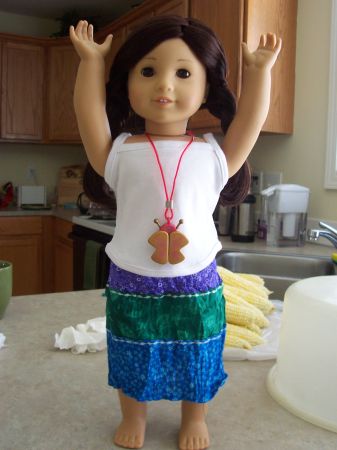
See? All done! Jess loves it! I pared mine with a white tank just for funsies, but you top it off with whatever you like.
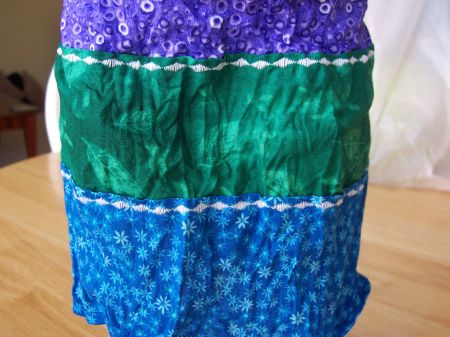
And look at those crinkles.
This is what I was talking about earlier -- you could, in theory, do the seams right side to right side, but doing the pressed lips kind of makes an edge on the skirt that will pop out when you crinkle it. I think it looks cool, and this is actually an idea I got by fiddling with one of my own skirts, so it's not unheard of.
Anyway, wasn't that easy enough? Enjoy it!